Tevo Tarantula Pro Auto Leveling Top 5 Facts
The Tevo Tarantula Pro is a popular 3D printer known for its affordability and versatility. One of the most valuable upgrades for this printer is auto leveling. This system automatically adjusts the print bed to ensure it is perfectly level, eliminating the need for manual calibration. Auto leveling greatly improves the 3D printing experience, resulting in better prints. Here are the top 5 facts that highlight the advantages of auto leveling for your Tevo Tarantula Pro, making your printing process smoother and more successful. Understanding these facts will empower you to make the most of your 3D printer.
Fact 1 Auto Leveling Improves First Layer Adhesion
A critical aspect of 3D printing success is the first layer adhesion. Auto leveling plays a pivotal role in ensuring this critical layer adheres correctly to the print bed. Without a properly leveled bed, the first layer may not stick, leading to warping, curling, and overall print failure. Auto leveling systems use sensors to map the print bed, compensating for any imperfections and ensuring the nozzle is at the correct distance across the entire surface. This results in a consistent first layer that adheres firmly, setting a solid foundation for the rest of the print. The result is a much higher success rate for your prints, saving time and filament.
Benefits of Auto Leveling for Bed Adhesion

The primary benefit is improved adhesion. Auto leveling precisely controls the nozzle height above the bed, ensuring the plastic is extruded at the optimal distance. This precise distance allows the filament to properly bond with the bed surface. This reduces the chances of prints detaching mid-print. Auto leveling also allows for more consistent adhesion across the entire print surface, especially on larger prints. The result is fewer failed prints and a more efficient printing process.
Troubleshooting First Layer Issues
If you’re still experiencing first layer problems, even with auto leveling, check a few things. Ensure your bed surface is clean and free of debris. Calibrate the Z-offset to fine-tune the nozzle height. Check your filament type and bed temperature compatibility. Adjusting the Z-offset in your printer’s settings can fine-tune the nozzle distance from the bed. Also, ensure the bed itself is not warped or damaged. Addressing these issues can significantly improve first layer adhesion and print quality.
Fact 2 Auto Leveling Simplifies Calibration
Manual calibration of a 3D printer bed can be a frustrating and time-consuming process, often involving paper tests and adjustments of bed screws. Auto leveling eliminates much of this complexity. The system uses a probe or sensor to measure the distance between the nozzle and the bed at multiple points. This data is then used to create a virtual map of the bed, compensating for any variations in surface level. The result is consistent calibration across the entire bed, simplifying the setup process and reducing the need for frequent manual adjustments. This feature makes auto leveling a time-saver.
The Traditional Calibration Process

Traditional calibration involves manually adjusting the bed screws while using a piece of paper to gauge the nozzle distance. This method can be challenging because it requires patience, precision, and often repeated attempts. The process can be further complicated by factors like uneven bed surfaces and thermal expansion. For many users, particularly beginners, traditional calibration can be a significant barrier to successful 3D printing. Auto leveling streamlines this process, making it easier and more efficient.
How Auto Leveling Streamlines Calibration
Auto leveling greatly simplifies calibration. The printer automatically measures the bed surface, eliminating the need for manual adjustments. The sensor quickly maps the bed, creating a virtual level. This means you only need to set the Z-offset, a simple adjustment. Auto leveling systems often include features that can save and recall calibration settings, which further streamlines the process. The benefit of auto leveling is a more user-friendly setup, reducing the learning curve for beginners.
Fact 3 Auto Leveling is Compatible with Many Materials
One of the great benefits of auto leveling is its wide compatibility with various 3D printing materials. Whether you are working with PLA, ABS, PETG, or other common filaments, auto leveling can accommodate. By ensuring consistent bed leveling, it helps to provide successful prints. This versatility allows you to experiment with different materials without the worry of complex calibration adjustments. The ability to print with a variety of filaments is an advantage.
Common 3D Printing Filament Types

PLA is easy to print with and is great for beginners. ABS is known for its durability and is good for functional parts. PETG offers a balance of strength and flexibility. Other options include TPU (flexible), nylon (strong), and specialty filaments. Auto leveling supports a wide range of filaments, making it easier for you to explore these materials. The key is to ensure the bed temperature is set properly for each material type.
Auto Leveling and Filament Compatibility
Auto leveling ensures consistent bed leveling regardless of the filament used. This means it can handle various materials without manual adjustments. The system can compensate for any bed imperfections. However, it’s always important to set the correct bed temperature. This feature makes auto leveling a versatile upgrade.
Fact 4 Auto Leveling Enhances Print Quality
Auto leveling significantly enhances overall print quality by ensuring a level printing surface. Consistent leveling allows for precise layering, detail and dimensional accuracy. This feature reduces the chances of common issues such as warping, elephant’s foot, and poor layer adhesion, all of which can detract from print quality. The result is a more polished and professional-looking final product, even with complex designs. This helps the Tevo Tarantula Pro deliver better quality prints.
How Auto Leveling Reduces Warping

Warping is a common problem, particularly with materials like ABS. It is caused by uneven cooling and can pull up the edges of the print. Auto leveling helps to prevent warping by ensuring the first layer adheres properly to the bed. This consistent adhesion creates a more stable foundation. The system compensates for minor imperfections in the bed, the key to reducing warping. This ensures the print stays flat throughout the printing process.
The Impact of Leveling on Detail
Precise leveling is crucial for capturing fine details. Auto leveling provides a consistent nozzle distance, so the plastic is extruded precisely. This precise extrusion allows for sharper corners, cleaner edges, and more accurate dimensional accuracy. The result is a print with intricate details. By removing the need to manually level the bed, auto leveling allows the printer to focus on the details.
Fact 5 Auto Leveling Saves Time
One of the most practical benefits of auto leveling is the time it saves. Manual calibration can take significant time and effort, especially if you are new to 3D printing. Auto leveling automates the calibration process. It can quickly and accurately level the bed. This means you can start printing faster, without wasting time on manual adjustments. The time saved can be used for printing, experimenting with new designs, or working on other projects.
Setting Up Auto Leveling System

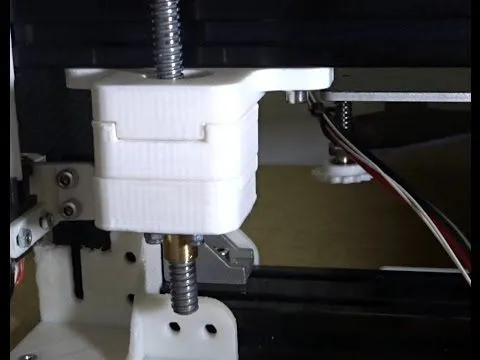
Installing an auto leveling system on your Tevo Tarantula Pro typically involves mounting the sensor and connecting it to the control board. Most systems come with clear instructions and wiring diagrams. Once installed, you will need to configure your printer’s firmware, which involves adjusting settings in the printer’s software or the LCD interface. The setup process is relatively straightforward.
Time Savings of Auto Leveling
By automating the calibration process, auto leveling significantly reduces the time needed to prepare the printer for each print. Instead of spending time leveling the bed manually, you can focus on slicing your model and starting the print. The time saved can be significant, particularly if you are printing frequently or if you are new to 3D printing. This efficient process improves your overall experience.